Monday, June 7, 2021

Doing things alone

Many years ago, I had to learn how to be alone for more than a year, and it was ok (though not tons of fun)! I don’t mind being alone at home so much anymore, especially after adjusting to being unemployed/back in school/pandemic restrictions, and I have no problem running errands or grocery shopping lone, but I’ve never enjoyed eating in a restaurant or going to the movies by myself. 

Now that I’m done with school and job searching, I’ve had some long days/weeks/weekends alone at home, and I decided to stretch myself by doing some things alone that I wouldn’t normally want to. For example, even going to a coffee shop alone seemed like a waste of time, since I could have coffee at home for just about free and not have to drive and park, listen to a noisy environment, or spend on overpriced caloric concoctions. 

 My life coach training is ready to go into business, so I’ve been challenging myself with reviewing the tools and using my own thoughts to practice some skills on. So, is it true that going to a coffee shop alone is a waste of time? Well, it depends. If I’m truly happy alone at home and am on a tight budget, then yes/maybe it’s not the best use of time and funds. If from time to time I feel a bit bored and lonely and can afford an overprices beverage/snack, then it’s not a waste of time.

it's still nice to go somewhere with another person!

 Is it true that anyone who goes out to eat or a movie alone has no friends? No, that is absolutely not true. I do have friends, AND it’s ok to be alone in public. I’ve been to three cafes recently and have 2 photos to prove it! The first place in Sacket’s Harbor, NY was fabulous. The cocoa was outstanding and the cookie was marvelous. It was not weird at all to be there alone. In fact, there were 2 other people there alone. I’m so glad that it was a positive experience.

hopeful seed sprouts for flowers this summer

The second place shall remain name-less and photo-less, as the cocoa was passable and the cookie was so-so. But I’m still proud of myself for continuing this challenge. Everyone else in this place was with friends, and the music was a bit too loud for me to be able to relax and enjoy my reading material, but I’m happy to learn and not feel weird being alone.


beyond refreshing- my new favorite

The last place to report on today was complete with outdoor seating near the river in Cape Vincent, NY. A sandwich wrap (2nd photo above), interesting new-to-me flavored water and a superb lemon blueberry cookie was another positive experience. I forgot to include the book I was reading in the photo but will make every effort to remember in the next photo location.


For some people, I’m sure this stuff is no big deal, but for an introvert who is conscientious of calories and relatively frivolous spending, this was an experiment in making progress. And more progress is to be made! I’ve done plenty of things alone in the past, especially when traveling for business made it impossible to phone a friend for a get-together. I now invite myself to continue stretching the comfort zone and continue to explore going out alone.

Friday, May 28, 2021

Bead button art

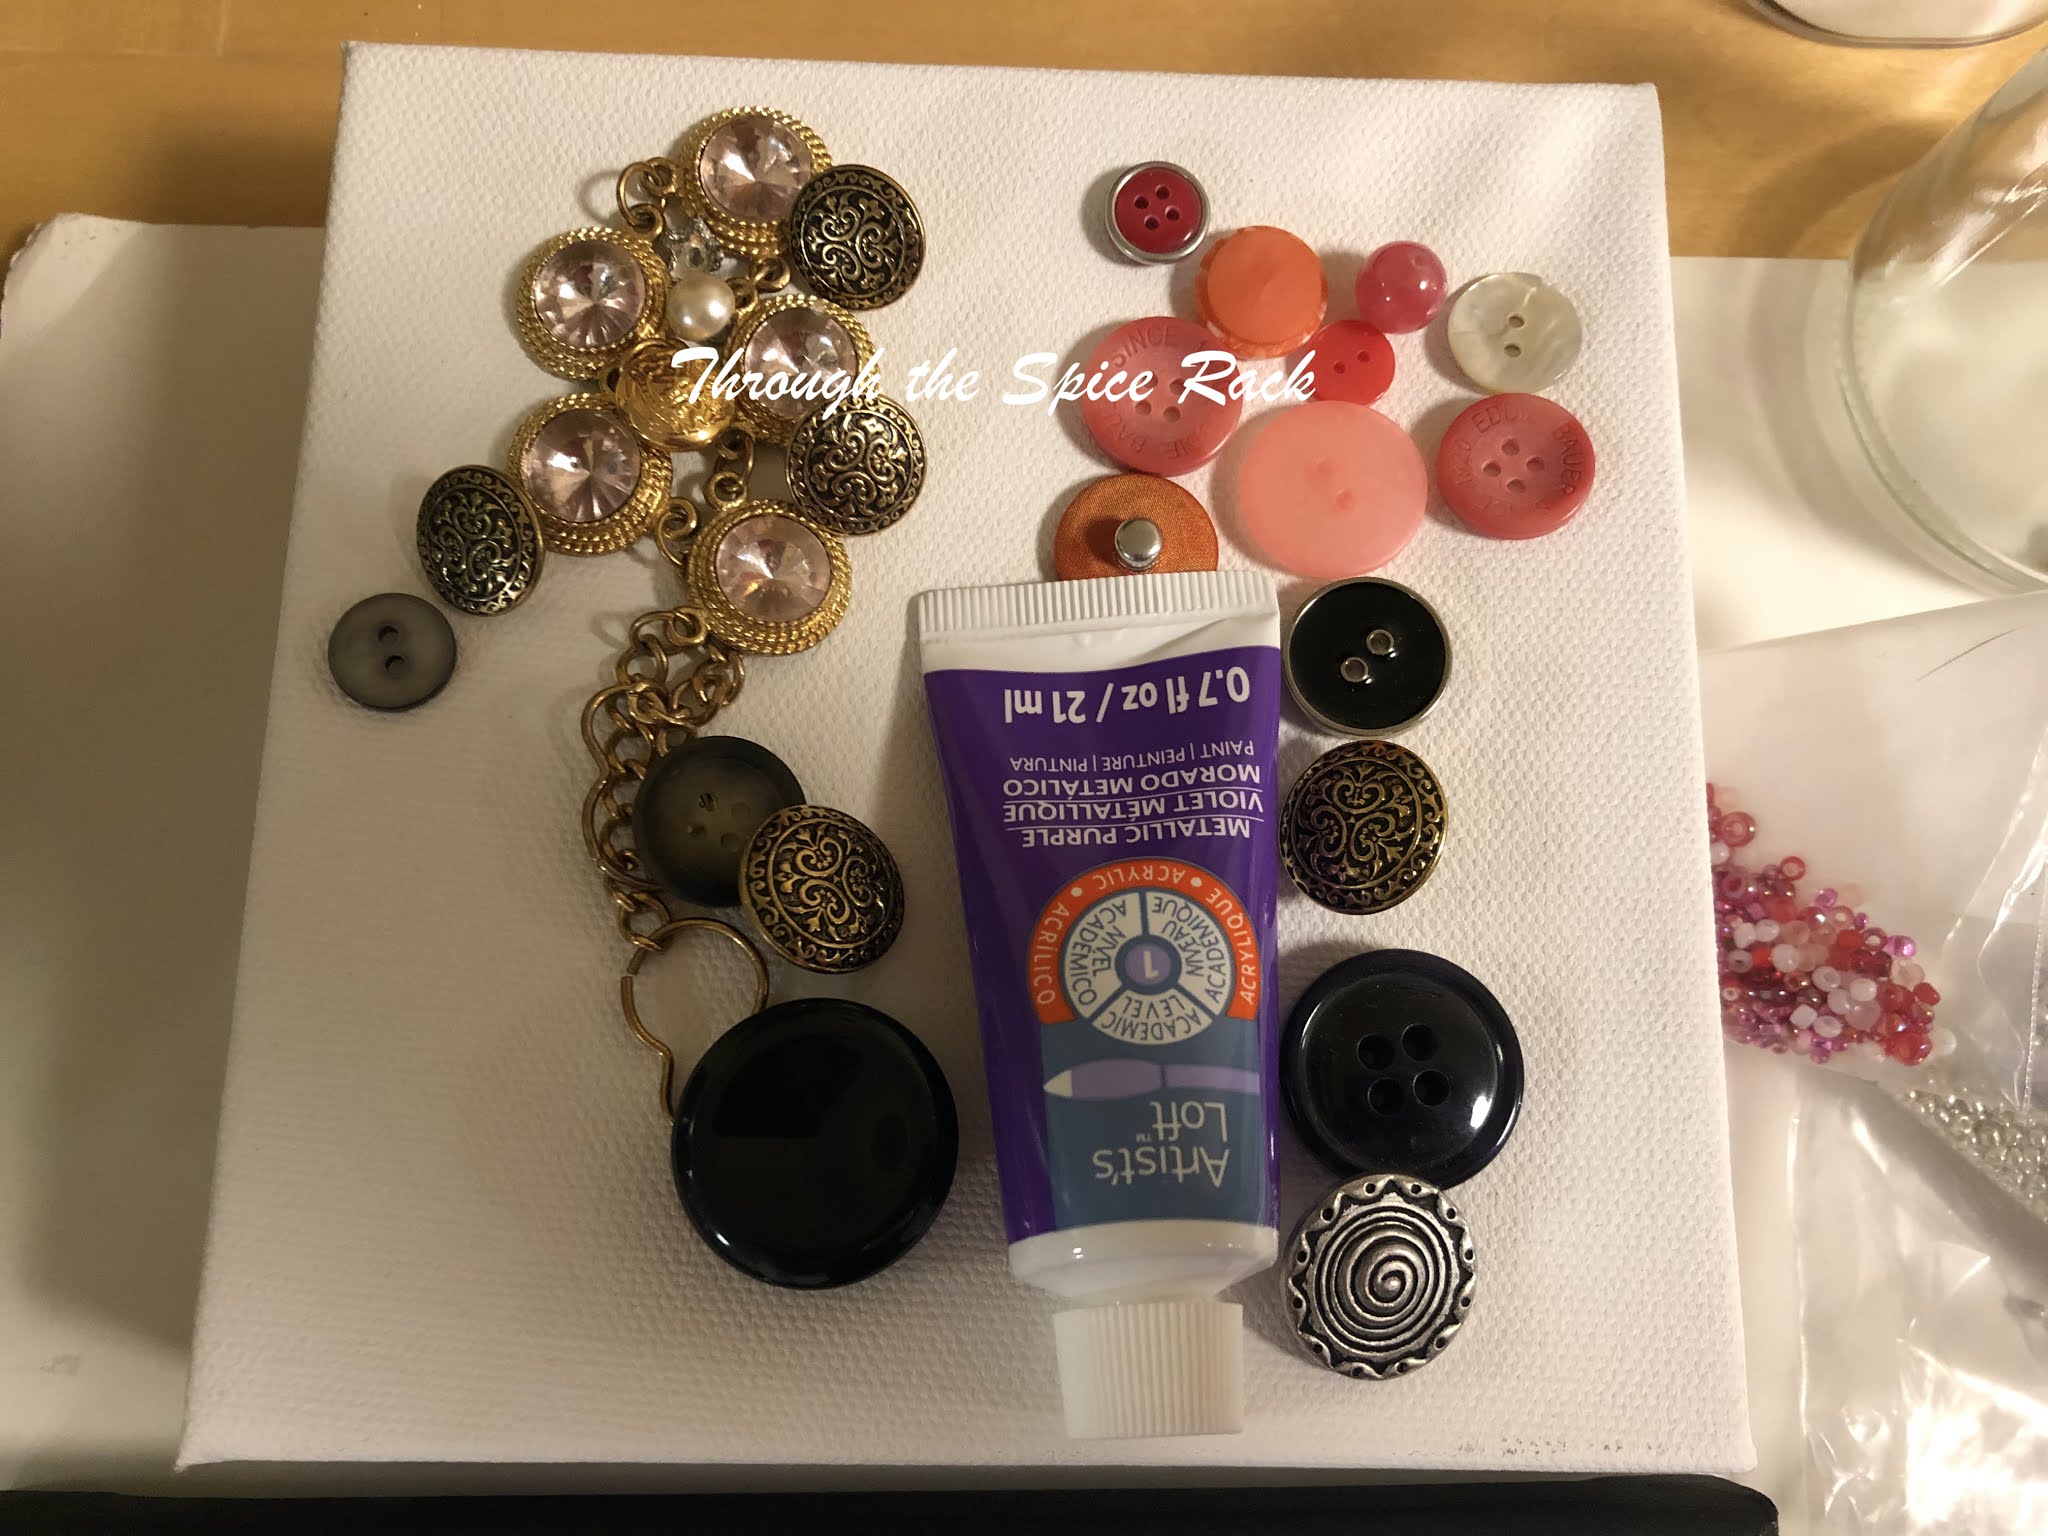
Do you have a jar or box full of buttons? I sure did, and when I realized that I no longer owned the clothes that the buttons went to, I decided to make art with buttons and beads on hand, inspired by a beautiful tree I saw at my advisor’s home in Iowa (photo below).

I soon realized that my button stash was insufficient to copy the tree exactly. Mine looked like a rainbow weeping willow!

After observing my tree for a few days (good thing I had not glued it!), I decided to try for flowers instead. I thought the flowers looked much cuter than the tree! 

Next, I had to learn about canvas, paint and glue! I’ve made collages before on cardboard and small solid canvas, but never a 3-d item. I had read about a product called gesso, and thought it might be glue-like (it is sort of, but other real glue is needed for beads and buttons). I got a package of different gessoes at a craft store, and had fun experimenting with various colors and textures. I also found Mod Podge with GLITTER! That plus 2 different kinds of glue was enough.

I wasn’t sure which size canvas would be the best, so I got 2 different ones, because I really wanted the size right between the two available ones. Rather than returning either the larger or smaller ones, I decided to use them all. 

I mixed gesso, acrylic paint and glitter Mod Podge on the backgrounds and then glued on the beads and buttons. I’m still adding “grass” in green and am considering adding “leaves” to the stems.

In the meantime, I’m pleased with the results. What would you like to make with your collection of buttons and beads?

Finally, I will need to figure out about arranging the flowers on the wall, with 3 larger and 3 smaller canvases.


Thursday, May 20, 2021

2021 update from the cats

It’s been almost 2 years since we have updated you on cat life, although we’ve been mentioned from time to time and during the great (awful for the cats) move from Germany back to the USA. The last you heard exclusively from us in June of 2019- before the move- we were doing well living in the suburbs of Stuttgart, Germany.

We waited so long for our furniture, saying “safe travels” to it at the end of October 2019 in Germany and finally seeing it again at the end of December 2019 in New York. We survived the flight from Frankfurt, Germany to Boston, followed 2 days later by the drive from MA to NY. We were very sad to say “good-bye” to Sebastian when he went over the rainbow bridge before Christmas 2019 at the amazing cat age of 19. He wanted to live, despite his kidney disease. We cats loved him, though not as much as Barbara, who cried for days.
Sebastian in Germany

As far as the pandemic goes, we understand it has been really hard for a lot of people, but we cats have loved every minute of it. This is the longest our humans have not traveled in years- no suitcases, yay. The windows here in upstate NY have given us excellent views of wildlife, from turkeys to birds galore to deer, rabbits, a woodchuck, and neighboring dogs.

Ida playing with a cat toy from Dubuque

Sidney greets the few visitors we have had, and goes out into the back yard on a harness and leash. She loves to help during online scrapbooking weekends by sitting on top of the supplies. Sidney also enjoys online church services and online choir rehearsals.

Ida is mostly an upstairs cat now, sleeping on the bed much of the day, but she also goes on the wall between the kitchen and the living room, especially when she wants Barbara to get off the couch and pay attention to Ida. Ida likes to sing out loud when Barbara is recording choir songs for the online choir concert.

Monday, May 10, 2021

Pecan Pie CHEESECAKE!

This most excellent dessert is worth the 4 hours of prep, baking and chilling time! I adapted a fabulous recipe in an effort to make it slightly healthier. I’ll let you know what’s what with the modifications so you can decide which ones you want to keep.

I used a 10.5 inch springform pan instead of the 9 inch pan called for in the recipe. This worked out well, though the entire cheesecake was a bit thinner. If you don’t have as many people to feed, or want a thicker cheesecake, use a 9 inch pan, or double the cheesecake layer ingredients for the larger pan (if desired).


Cut a piece of parchment paper to fit the inside of the springform pan, place it inside the assembled pan, then spray with baking/cooking spray. From previous posts, you can see that I often make cheesecakes in pans other than “springform”, so it will still taste great even if you don’t have a fancy pan- it just looks nice when you remove the round sides before serving.

Preheat the oven to 325 degrees.


Here is what I used for the crust layer:

1 and ¼ cups graham cracker crumbs

¼ cup each tapioca flour, coconut flour, quinoa flour*

6 TBSP melted butter

4 TBSP brown sugar (note, despite reducing the amount of sugar in the original recipe to 4 TBSP, the entire cheesecake was still very sweet to my taste. I would use LESS sugar in the crust next time, probably 3 TBSP, due in part to the large amounts of sugar in the other layers).                                                                                                                                                       


* if you don’t have alternate flours, just use 2 cups of graham cracker crumbs for the crust, and/or substitute any other alternate flours to your taste, such as almond flour, etc.


Melt the butter, add the crumbs and sugar, stir, press into the bottom and up the sides of the springform pan. The original recipe did not call for baking the crust, but I have been making cheesecakes for years and normally bake the crust, even for no-bake cheesecakes. Since I used additional ingredients besides graham cracker crumbs, I baked the crust for 10 minutes and was pleased with the results. If you use only graham cracker crumbs you do not have to bake the crust. If you bake it, let the crust cool for a few minutes out of the oven. Chill in the fridge or freezer while you prepare the next layer (my freezer never ever would have enough space for a springform pan!).

Here’s what I used for the first pecan layer:

1/3 cup butter

2 eggs

1 tsp vanilla

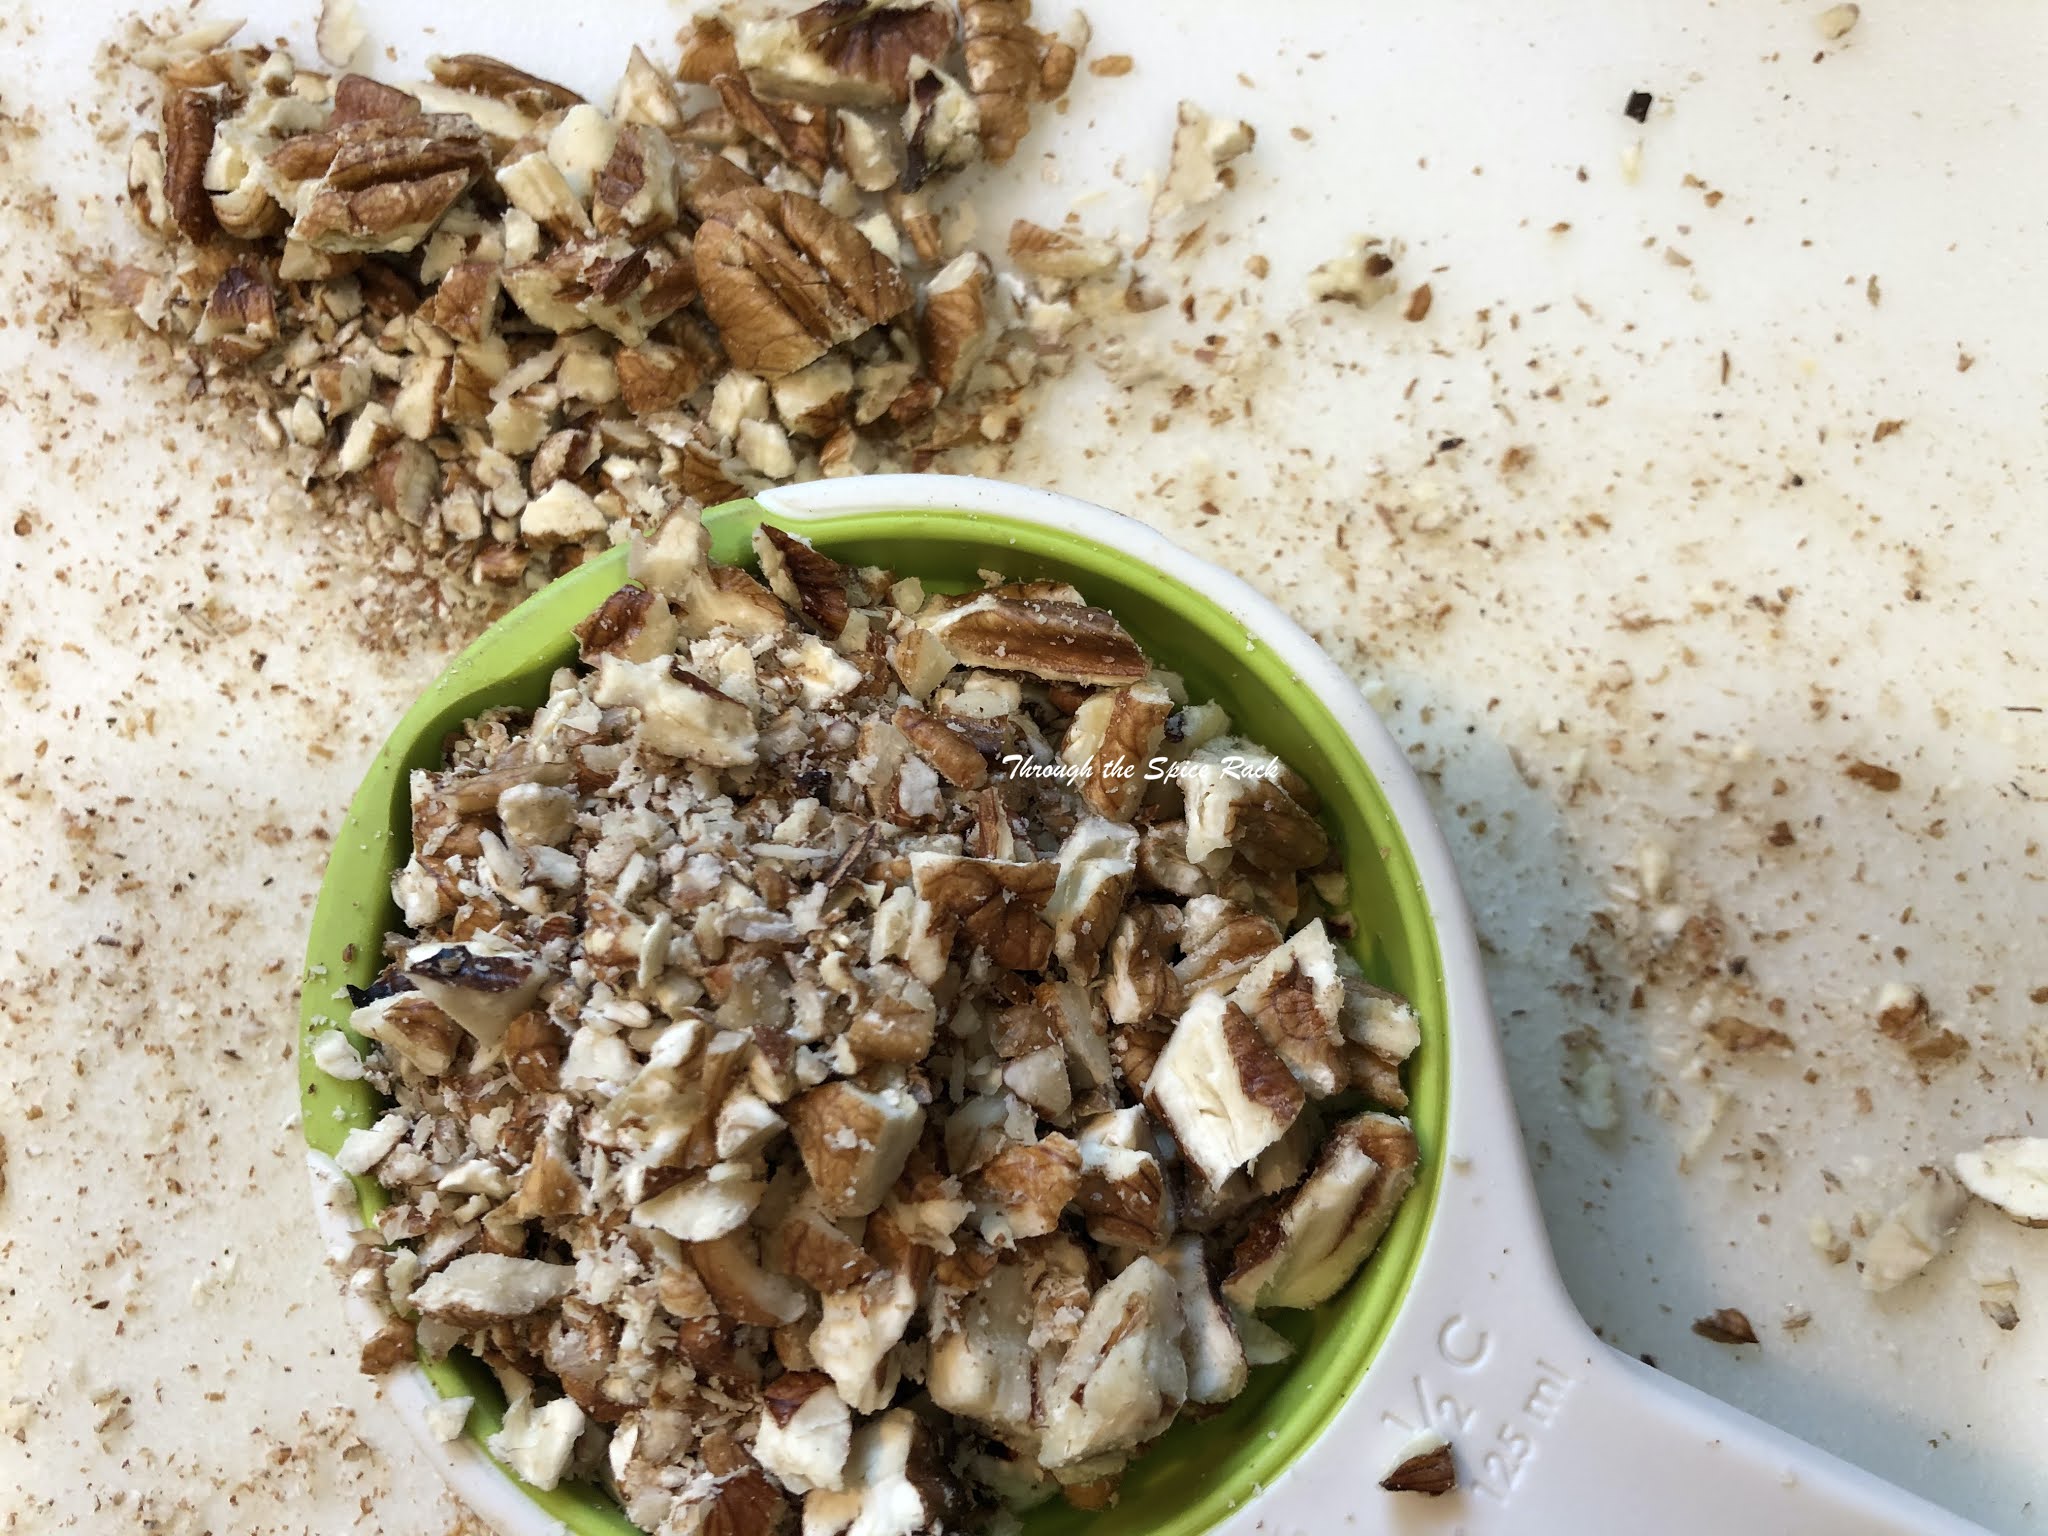
1 and ½ cups chopped pecans

1 cup brown rice syrup*

½ cup sugar (note, next time I would use 1/3 cup sugar, even though the original recipe called for even more than ½ a cup of sugar)                                                                                                          


In a pot on the stove, bring these ingredients to a boil, then lower the heat and stir until thickened. Pour over the chilled crust.                                                                                                                                                                               


*if you have ever made pecan pie before, you probably expected to see light corn syrup here, which is what the original recipe called for. I’m trying to use healthier/more natural ingredients, and since the health food store where I went didn’t have light corn syrup, I decided to give brown rice syrup a try. The label says it can be used as a substitute for corn syrup. This layer in the cheesecake tasted wonderful. The texture was a bit chewy, which may be due to how I heated it or it could be due to the substitution. Please feel free to use light corn syrup; I will stick with the brown rice syrup.

Here’s what I used for the cheesecake layer:

2 blocks of cream cheese, warmed to room temperature for ease of mixing

½ cup sugar (this is down from the original recipe; I would keep this amount next time)

1 and ½ TBSP flour (I used gluten free flour)

1 TBSP vanilla (I accidentally used only 1 tsp vanilla and it could benefit from a bit more flavor, though nobody complained!)

3 eggs

½ cup sour cream (I used Lactaid sour cream)


This photo is of the first pecan layer

Blend cream cheese and sugar, add remaining ingredients- mix between each egg. Bake for 1 hour over a water bath*, then turn off the oven and leave the cake inside the oven for 30 minutes. Then crack the oven door and let the oven and cake cool for another 30 minutes. 

*wrap the bottom/sides of the spring form pan with aluminum foil. If you have a large enough pan to place the springform pan in, put the springform pan inside a large pan and put water in the large pan, being careful to avoid water over the top of the foil, so no water can get into the springform pan. My pan was too large to fit into another pan, so I put a large pan with water on the oven rack just underneath the springform pan. I hope the steam effect was still useful (the cake tasted great). As you can see in the first photo, using a larger pan but keeping the same baking time resulted in a slightly browned cake top (normally I would open the oven to check for doneness, but I thought the oven should not be opened with a timed water bath, so I couldn’t see that it was browning up). It didn’t taste burned at all, but if you will use a 10.5 inch springform pan, I would reduce the first baking time by 10 minutes. If you use a 9 inch pan as called for, keep the hour. I will report back if I double the cheesecake layer next time, because it should need a longer baking time.


Here’s what I used for the second pecan layer (topping):

¼ cup butter

1/3 cup brown sugar (note, this was beyond delicious. I might add less sugar next time)

½ tsp vanilla

¼ cup heavy cream

1 cup chopped pecans*


Heat the butter and sugar until the color deepens. Remove from heat and add the remaining ingredients. Pour over the cheesecake!

This photo is of the first pecan layer, not the topping

The original recipe recommended chilling the cheesecake for hours/overnight. This might result in a nice firm cheesecake, but we didn’t have time to do that, and it tasted great without the hours of chilling. 


* I have never tasted such delicious pecans as I did this year when I received some as a gift from a friend in Texas. Plain grocery store pecans will be avoided whenever possible from now on. Apparently, pecans from Texas are something special!


Sunday, May 2, 2021

Peanut Butter Cheesecake

I’ve previously shared two cheesecake recipes from my trusty cookbook and have since continued to explore recipes with additional flavors. The cheesecake brownie cupcake recipe is here, and the lemon one is here. This week, I had a request for peanut butter cheesecake, and I modified the recipe as follows:


Take 4 blocks of cream cheese out of the refrigerator 2 hours before preparing this recipe for ease of blending. Take your favorite jar of strawberry or grape (or any) jelly out of the fridge before baking to let it come to room temperature.


A 9x13 pan is good for a large family-style serving, so I nearly doubled the ingredients. Preheat the oven to 325 degrees. Melt 6 TBSP butter, add 2 cups graham cracker crumbs and 5 TBSP sugar*. Stir. Press into the bottom of a 9x13 pan and bake for 10 minutes. Remove from oven and increase oven temperature to 450 degrees.


Put 4 blocks of cream cheese into a large bowl. Add 6 TBSP flour (I used 3 TBSP regular flour and 3 gluten free), 1 ½ cups sugar* and 1 ½ cups chunky peanut butter. Mix until blended.


Add 8 eggs, mixing between each egg- I used 4 real eggs and 1 cup of liquid egg white substitute. After the eggs have been blended in, add 1 cup milk- I used ½ cup coconut milk and ½ cup fat free lactaid milk. 


Note: these amounts are just about doubled from the original recipe for a round pan, however, the batter is more than will fit into a 9x13 pan. You will have enough extra batter for 6 cheescake cupcakes and a mini loaf pan. The batter will rise as it bakes so you do not want to fill the pan to the top. You can use small wafer cookies as the crust in the cupcakes or pour the batter into the cupcake papers without a crust.


Pour the batter into the pan, leaving at least a ½ inch from the top edge of the pan. Bake for 10 minutes, then reduce the heat to 250 degrees. Bake another 40 minutes. When you take the cake out of the oven, run a knife around the edge between the cake and the pan, and let the cake continue to cool. 


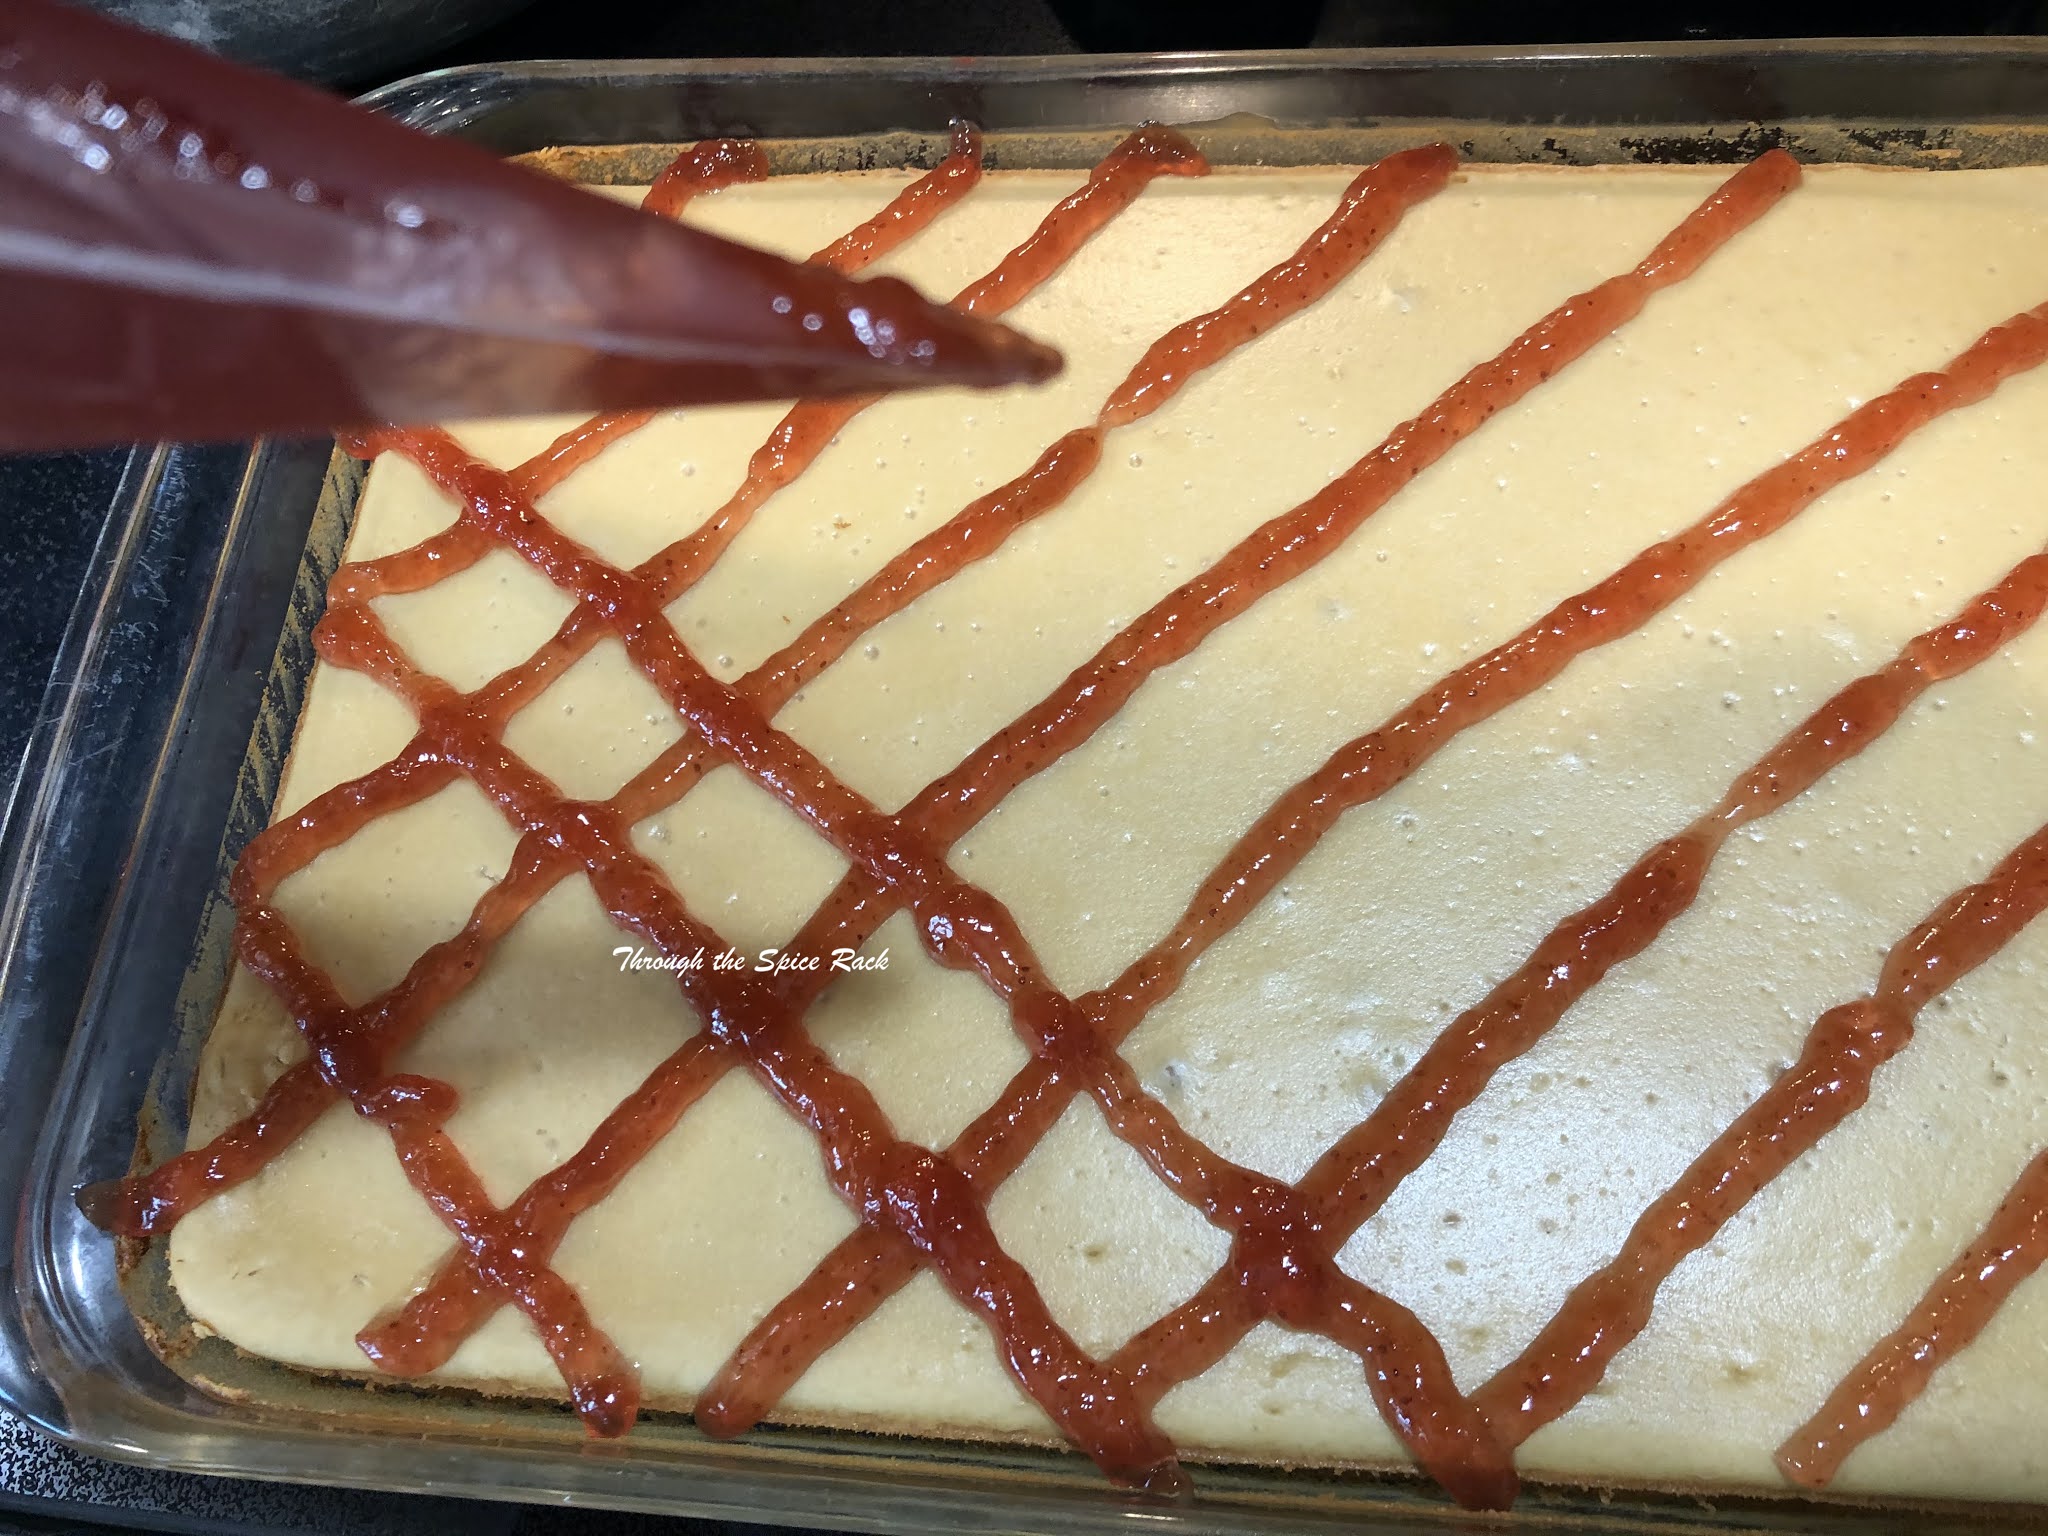
Now comes the fun part! Well, baking is fun for me in general, but this is extra fun: add 5 or 6 large spoonfuls of strawberry or grape jelly into a pastry bag (or any small plastic bag or icing tool). Cut a small hole into the tip of the pastry bag or the corner of a square bag and pipe the jelly across the top of the cheesecake in a lattice shape. Add more jelly to the bag if you use it all before the design is done. This is the first time I used a pastry bag to pipe anything, so the jelly was a bit squiggly, but that’s ok! It tasted great!


*note: this is already a reduction in the amount of sugar called for in the original recipe. I know some of you (like me) automatically cut the sugar in a recipe. The original recipe called for more than this, so the reduced amounts listed here are not “too sweet”.

Saturday, April 10, 2021

Nantucket and chocolate trifle

I visited the island of Nantucket many years ago when I was a summer nanny, and remembered it as cute and quaint. Now that we have friends who live there and 7 COVID vaccinations between the 4 of us, we drove across NY and MA to take the ferry to Nantucket for the weekend. 


The ferry ride was fine on the way over, but the water was a bit choppy on the way back, but nobody near us actually got sick due to the bobbing of the boat. It was nice dropping off our luggage in Hyannis before parking the car in a lot further away. The daffodils had only just poked their leaves out of the earth in upstate NY but were already blooming on the island. 


We enjoyed walking on the beach even though we had coats on. I miss the ocean, sea salt air, cawing seagulls and the sound of surf. We also walked around town, checking out TWO real bookstores (the closest one to where we live now is an hour away), a pharmacy with a counter offering ice cream among other things, a grocery store for ingredients (photo of trifle and recipe at the end of the post), and a couple of places to get a bagel and other pre-cooked foods.


Based on what we heard over dinner, we wouldn’t be able to afford a week on Nantucket at lodging prices during the summer, but it was a great spring weekend away.


Trifle:


Step one: Prepare cake or pound cake either from a box mix, from scratch, or use a store-bought pound cake. I made a lemon trifle from scratch during the great lemon escapade a few years ago, and the sky is the limit when it comes to flavors for trifle. This time, I used a box mix for chocolate cake and followed the package directions. You can substitute apple sauce for the oil, egg substitute, etc. Bake and let cool, then cut into small squares.


Step two: Make two boxes of pudding according to the package directions. You could make pudding from scratch… Allow pudding to set. I used chocolate pudding mix, and it’s your choice if you’d like to mix up flavors/colors, such as butterscotch, pistachio, etc.


Step three: Make whipped cream from scratch or buy a tub of frozen whipped product.


In as large of a glass dish/bowl you have, place a 2-inch layer of cake squares. No need to line them up, just toss them in. You don’t need to measure how deep the layer is- I prefer to have 2 layers of everything, so that’s why I keep them a bit smaller. If you have a deep trifle dish, you can make the layers as large or small as you wish.


Spoon in no more than half of the chocolate pudding. This dessert is fun to make because it doesn’t have to look perfect. It will look great and taste fabulous, so don’t worry about filling each hole between the squares of cake.


Spoon a layer of whipped cream over the chocolate pudding. Uneven is ok, and the layer doesn’t have to be the same depth all the way across. It is kind of (very) messy to distribute into individual serving dishes later, so nobody will see what the inside of the trifle layers look like.


Add another layer of cake, pudding, and whipped cream. Most containers will be full at this point. You can shave some chocolate on the top if you like. I would typically add fruit but didn’t this time. For kids, you could add cola-worms for a “dirt” dessert.


If you have enough tall glass dessert containers (for example, sundae dishes), you could make a bunch of individual trifles. However, most people like to see the giant trifle brought out, and don’t mind getting scoops of mixed-together dessert goodness in their own bowls.


Please note that this dessert is very sweet- especially the chocolate. I really like the lemon version and would like to try other flavors in the future, such as strawberry. I could also imagine making this with blueberry muffin mix made in a loaf pan, layering it with vanilla pudding.

Monday, February 22, 2021

Best of blog posts: travel, cooking, life lessons and moving

Please forgive the long absence from this blog! I get confused and concerned when my favorite bloggers don’t post for months at a time, and here I am doing the same. Hopefully you guessed that I was busy with the podcast, which is true!


Since starting the podcast in June 2020, 37 episodes have been published and 3 recordings are scheduled for upcoming episodes. Details are at www.40Minutesoffaith.com 

During the stay-at-home orders for the past 11 months, I didn’t feel like I had much new to report. I’ve been thinking about what to write in the absence of travel, lack of energy to try new recipes, or learning interesting life lessons. If you have any suggestions for topics, please share.

I never looked at blog analytics until I started considering podcast analytics. I was pleasantly surprised to see what the top 10 blog entries were since beginning with recipe posts in February 2012. The blog evolved from going through the spice rack to a few arts and crafts posts to lots of trave posts when we moved to Germany. In case you’d like to catch up on previous posts, here are the most read posts:

4 popular posts about food include:


Sesame aioli- by far the most read post - who knew?


A remake of church cookbook recipes of carrot souffle, sweet potato and corn casseroles [Kleenex alert- if you are from the midwest or the south, I am not trying to make you cry by drastically reducing the amounts of sugar, cream, eggs, butter, etc.]


Mac’n’cheese


Spekulatius cookies (I considered this to be a relative fail & enjoyed locally store bought cookies in Germany for 5 years. Alas, no stores in upstate New York carry them)

1 very popular post about food and travel was about grocery stores in Germany


4 popular posts included life, moving, and travel:

Week 1 of Yesses and Nos when we got to Germany

Reverse culture shock when we returned to the US 5 years later

Yesses and Nos when we were moving back to the US

Missing Germany 

1 popular post about life after losing a job


Finally, here are the 10 most popular travel posts out of 262 blog posts in the last 19 years:

Off the beaten path (OBP) Sequoia, California

Treetop walk in Germany

Switzerland - mmmm, cheese followed by chocolate!

OBP Spain

OBP France

OBP Finland - one of my favorite trips!

Trash removal in Germany

Gozo Island/Malta

Stuttgart Botanical Gardens and Zoo

OBP Mainz, Germany 

I intend to resume regular blog posts and will strive to not think of everyday life as “boring” or not worth writing about. Maybe I have learned some interesting life lessons!